
Appearance
Pages
How to configure Pages in Gfacility: create and share a page per role, then build the layout with drag and drop widgets or with AI-generated custom HTML.
Updated Sep 1, 2026
Configuration · Appearance · Pages
Until the 2026 Q3 release every user had a single homepage. Pages replace it: you build as many pages as you need, each tailored to a role or a purpose, and they appear under Pages in the sidebar for everyone you share them with. Think of a service desk page for handlers, a workplace page with booking shortcuts for everyone, and a management page with the numbers. Pages are screens inside the app for logged-in users; the displays on TVs in a lobby or control room are a separate feature (see Dashboards).
Why this matters to the business
"One homepage has to serve everyone"
Build a page per role instead: handlers open their queue, end users see three big buttons, managers see the numbers.
"End users get lost in the modules"
A simple page with quick actions (report something, book a room, invite a visitor) is all most colleagues ever need.
"Every department wants its own view"
Share a page with a group and only that group sees it. With the manage-own permission, users can even build their own.
"Our intranet page is always out of date"
Data widgets show live tickets, bookings and KPIs straight from Gfacility, so the page never goes stale.
Creating a page
Go to Pages and choose Add page. The dialog captures the essentials; the layout comes afterwards, in the editor.
| Setting | What it does |
|---|---|
| Title | The name users see in the sidebar and in the page list. |
| Code | A short internal reference, unique within your environment. |
| Use page builder | On for every new page: it opens the modern drag and drop editor with the full widget set. Off keeps the classic dashboard layout, which only exists for pages converted from the old homepage. |
| Allow duplication | Lets others with access make their own copy of this page as a starting point. |
| Shared with | The users and groups who see this page. Nobody selected means only you (and admins) see it. |
Two ways to build the layout
Once the page exists, you build what is on it. There are two routes, and choosing the right one up front saves the most time.
Route 1 · Drag and drop
Drag ready-made widgets from a panel onto the page and configure each one in a settings panel. Intuitive, everything stays inside Gfacility, and no other tools are needed.
The trade-off: you are bound to what the widget catalog offers, and arranging and configuring widget by widget takes more time.
Route 2 · Custom HTML with AI
Describe the page you want, let Gfacility compose the instructions, and have an AI tool generate the design. Far more freedom, and a complete page stands in no time.
The trade-off: it is a little less intuitive, and you need an external AI tool such as ChatGPT or Claude.
It is not either-or. A custom HTML block is itself a widget, so it can fill the entire page or sit as one block on an otherwise drag and drop page, with standard widgets around it.
Route 1: build with drag and drop
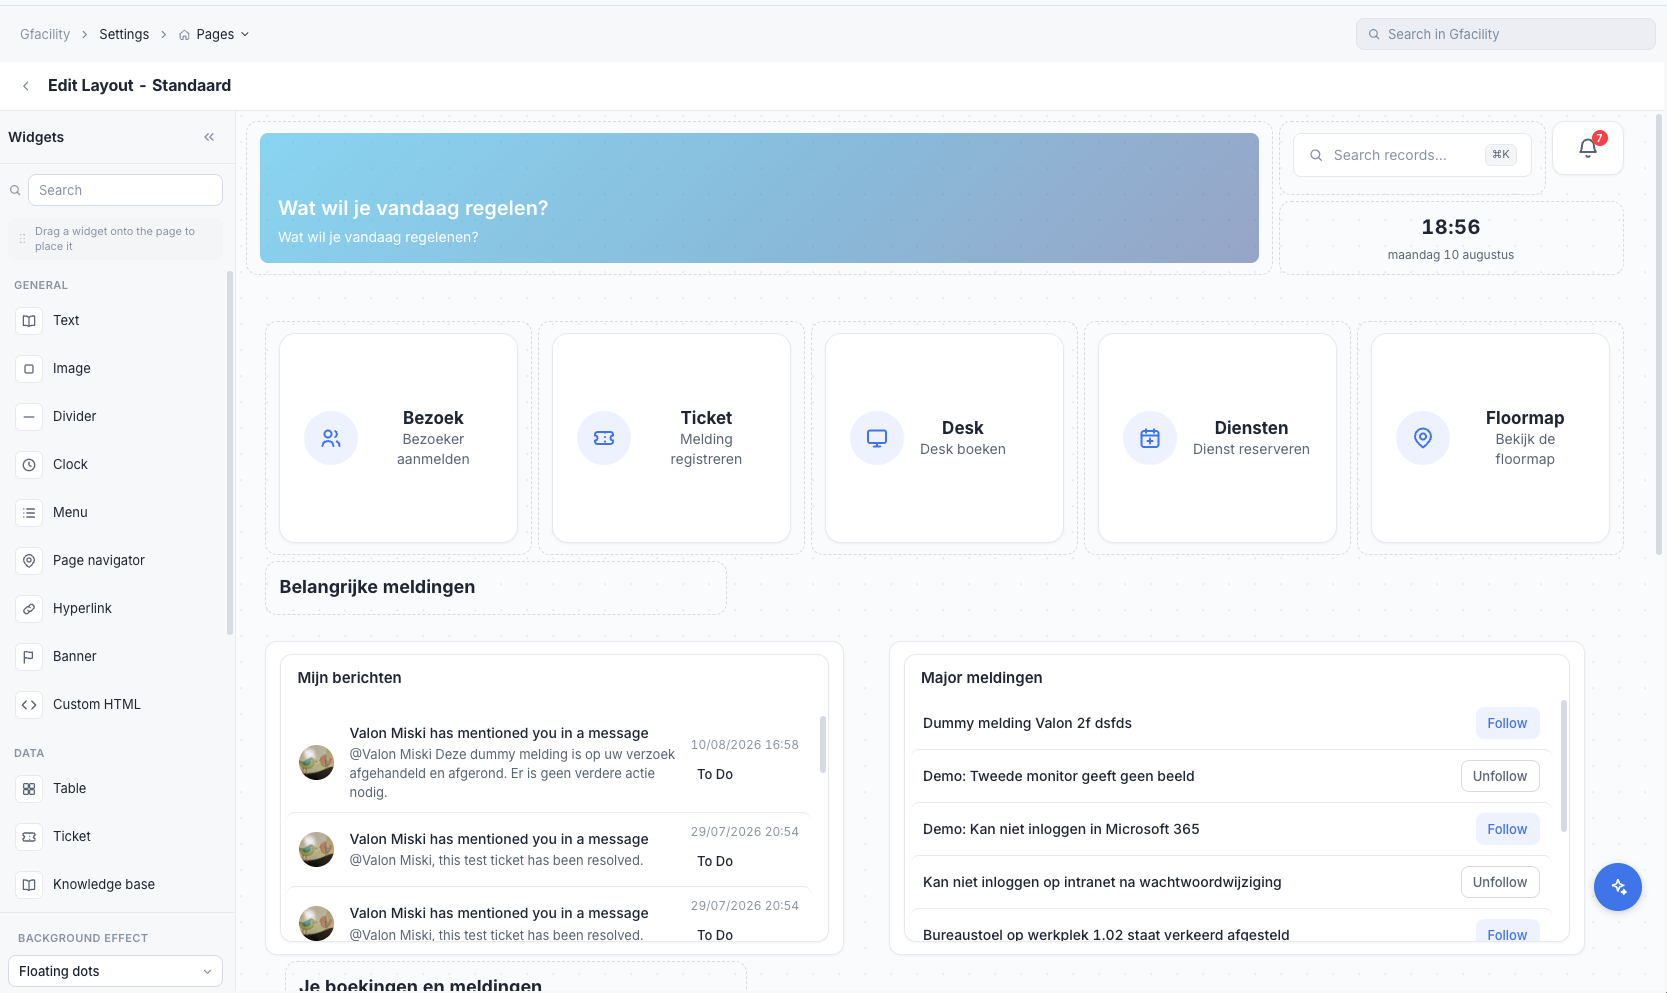
Open the page in the editor. On the left is the widget panel, grouped into general, data and action widgets; the canvas in the middle is the page itself. Click or drag a widget onto the canvas, then move and resize it until the layout is right. Selecting a widget opens its settings: title, colors, and for data widgets the module and the saved view that decides which records and columns it shows. The page itself can carry a background effect (such as dots, a gradient glow or waves).
| Group | Widgets |
|---|---|
| General | Text, image, divider, clock, menu, page navigator, hyperlink, banner and custom HTML. |
| Data | A table of any module's records based on a saved view, ticket and knowledge base lists, a calendar (day, week, month or agenda), charts and KPIs from analytics, Power BI reports, notifications and office days. A filter widget narrows the other data widgets on the page, so one page can act as an interactive report. |
| Actions | A search bar, quick actions and buttons that start a create flow (a ticket, booking, visit, desk and more), optionally with a template pre-filled. |
Route 2: build with custom HTML and AI
When the standard widgets do not cover your design, place the custom HTML widget on the page and open its builder. It has three panes: the HTML code, a live preview, and the build instructions. You do not need to write HTML yourself; the instructions pane composes a complete AI briefing for you.
| Step | What you do |
|---|---|
| 1. Describe your page | Write in your own words what the page should look like and do, for example "a welcome page with our logo, a big Report a problem button and a list of open tickets". |
| 2. Select the elements | Walk through the catalog and add everything the page needs: create buttons (optionally pre-filled with a template), links to modules, a search button, a notification bell, live tables and compact lists based on your saved views, a calendar, and charts or KPIs. Each element you add lands in the instructions with the real IDs from your environment. |
| 3. Copy the AI instructions | The instructions grow live on the right as you describe and select. Choose Copy all instructions once everything is in. |
| 4. Paste them into your AI tool | Paste the instructions into ChatGPT, Claude or another AI assistant, together with any design wishes (colors, style, a screenshot of your house style) and ask it to build the page. |
| 5. Paste the HTML back | Copy the generated HTML into the HTML pane. The live preview shows the working result immediately; adjust by asking the AI for changes and pasting again. |
Safe by design
The HTML runs in a sandbox and cannot touch the rest of the app. Data elements show live records with the rights of whoever is looking, so nobody sees more than their permissions allow.
Fits the app automatically
Pages built this way follow the light, dark and custom theme of your environment, and the embedded tables, calendars and buttons behave like the real thing, because they are.
Who sees a page
A page is visible to its owner and to the users and groups in Shared with; users with the read permission on the dashboard settings see every page. Everyone sees their pages under Pages in the sidebar, where each user can pin and reorder them. Sharing is also the off switch: a page has no draft or inactive state, so it is live for its audience the moment it exists.
Default pages
Company default
Set in the general settings: the page users land on after logging in when they have not picked one themselves.
Personal default
Every user can mark any page they can see as their own homepage with the star in the sidebar. No extra permission needed.
Assigned by an admin
An administrator can set a specific page as a user's homepage, for example a handler page for everyone on the service desk.
Permissions
The rights live under Settings, in the dashboard category. The interesting one is manage own, which turns pages into a self-service feature.
| Permission | What it allows |
|---|---|
| Read | See every page in the environment, shared or not. |
| Create / Update / Delete | Full management of all pages, typically for admins. |
| Manage own | Users build and edit their own pages, without touching anyone else's. They can copy another page only when its Allow duplication toggle is on; the copy is theirs. |